
Online Ordering
Two Convenient Ways to Order
Ordering beautiful, high quality professional photo prints, canvas prints, photo gifts, cards and more is quick and easy with our ROES ordering software! Or go to the link below to access our online site for photo gifts and specialty items.
ProColor ROES is your desktop computer solution for ordering, and it’s free to download. It’s easy to load your images in to the program and order thousands of different products. You can zoom, rotate, and crop with the click of a button. The pager feature makes design a breeze. This is available for Mac or PC.
ProColor ROES for Mac or PC
NOLA Photo Gifts for Computer or Mobile Device
Our new online ordering website that will allow you to order most of our specialty items without downloading ROES. This allows for ordering from both computers and mobile devices!
ProColor ROES is our free online ordering software that allows photographers to submit print and product orders directly to Professional Color Service.
Built on a Java-based interface and fully integrated with our automated lab systems, ROES makes ordering fast, reliable, and efficient. Every product we offer is available through ProColor ROES, helping you submit jobs quickly and receive finished products sooner.
A Step-by-Step Guide for Professional Photographers
How to Order Prints with ProColor ROES
Step 1: Launch ProColor ROES and Start Your Order
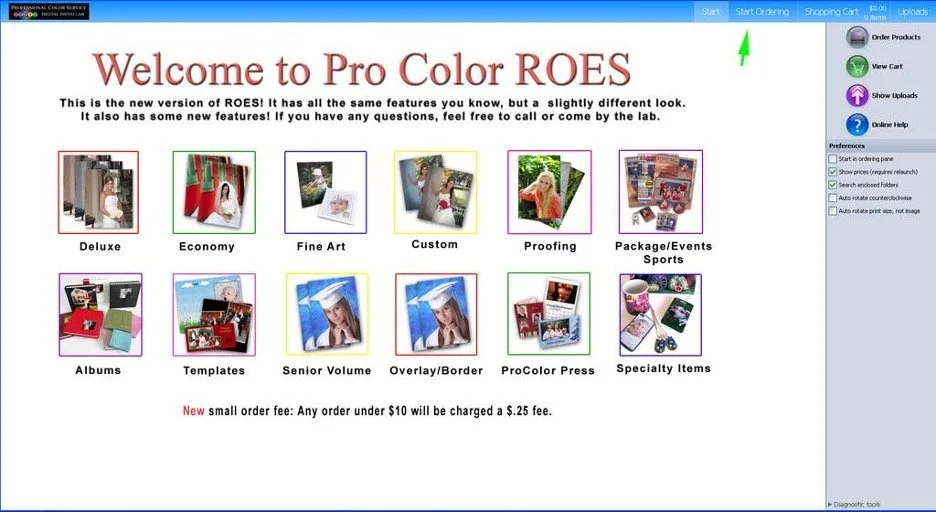
When ProColor ROES loads, the splash screen appears. This screen highlights new products, features, and shortcut links to popular catalogs.
You can:
Click a catalog shortcut to jump directly to products, or
Click “Start Ordering” in the top-right corner
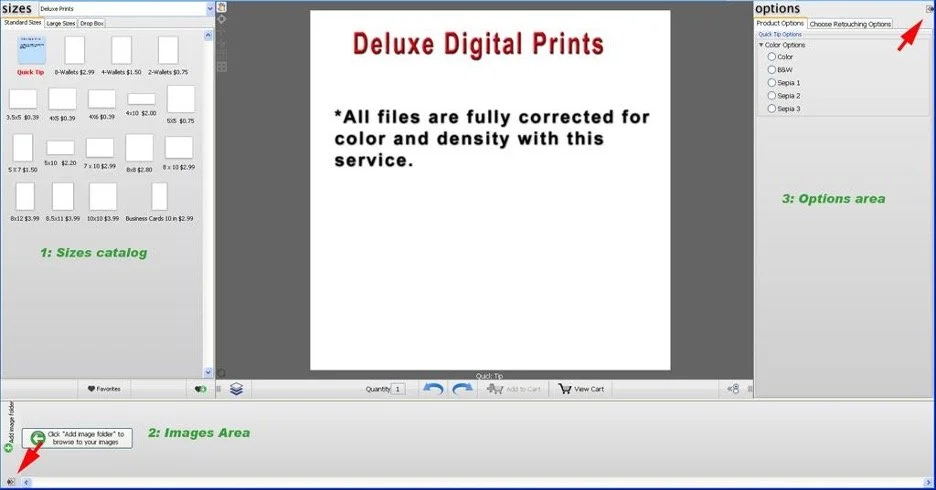
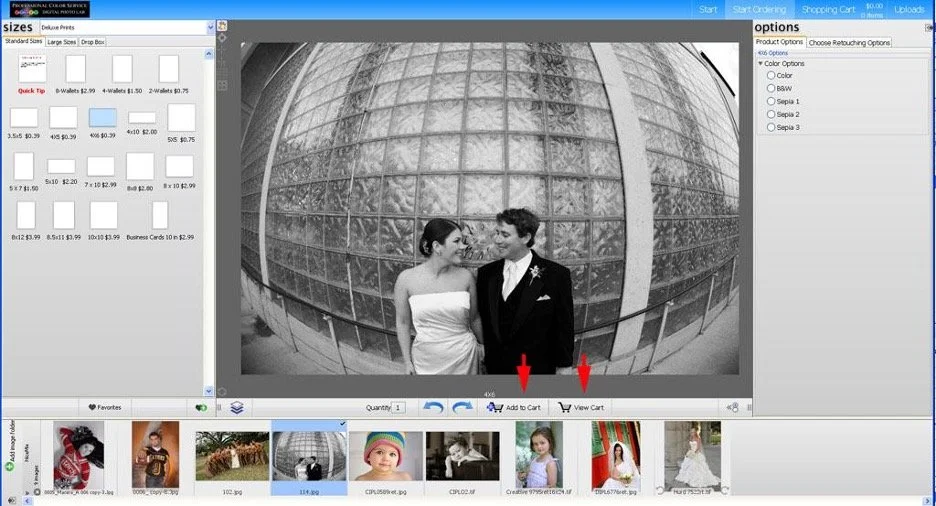
Step 2: Choose a Product from the Sizes Catalog
The Sizes Catalog lets you select exactly what you want to order.
Use the dropdown menu at the top to:
Switch product catalogs
Select a print size, template, or specialty product
Once selected, the product will display in the main workspace.
Step 3: Load Your Images into ROES
To upload images:
Click the “Folder…” button in the Images Area
Select the folder on your hard drive containing your files
Click Open
ROES will load all images in that folder and its subfolders.
💡 Tip:
If too many images load, return to the ROES Start screen and uncheck “Search Enclosed Folders.”
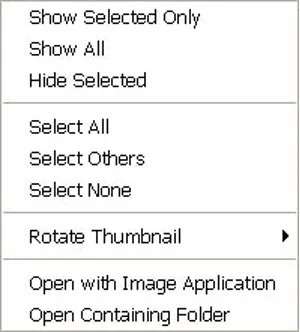
Step 4: Organize and Select Your Images
Once images are loaded, you can:
Reorder, rotate, or hide images
Right-click for additional image options
Select multiple images at once (great for proofing or batch prints)
To add images:
Select one or more images
Drag them directly into the product in the main window
Quantities can be adjusted later in the Review Order screen.
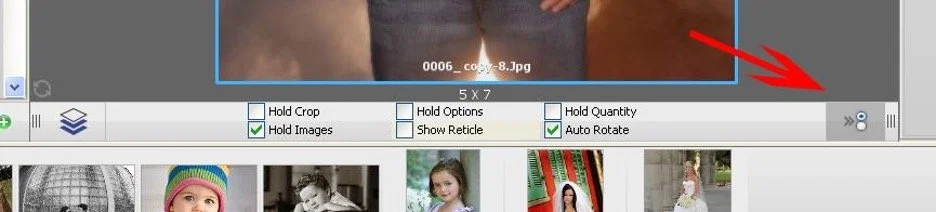
Step 5: Choose Product Options
The Options Area allows you to customize your product based on what you selected.
Options may include:
Mounting
Color or paper choices
Card spreads or press paper types (for press products)
⚠️ Not all options appear here.
Shipping, handling, and some order-level options are selected later during checkout.
You can also reposition the Images Area and Options Area using the arrow controls to customize your workspace.
When you have a product selected, choose an image from the image area and drag it into the product in the main window. The image will fill the product area and you will be able to see how it will crop.

When you have the image node selected, the editing drop down appears. Use these buttons to zoom in and out, rotate the image and several other options. If you scroll over a button with the mouse and a description of what it does will pop up.
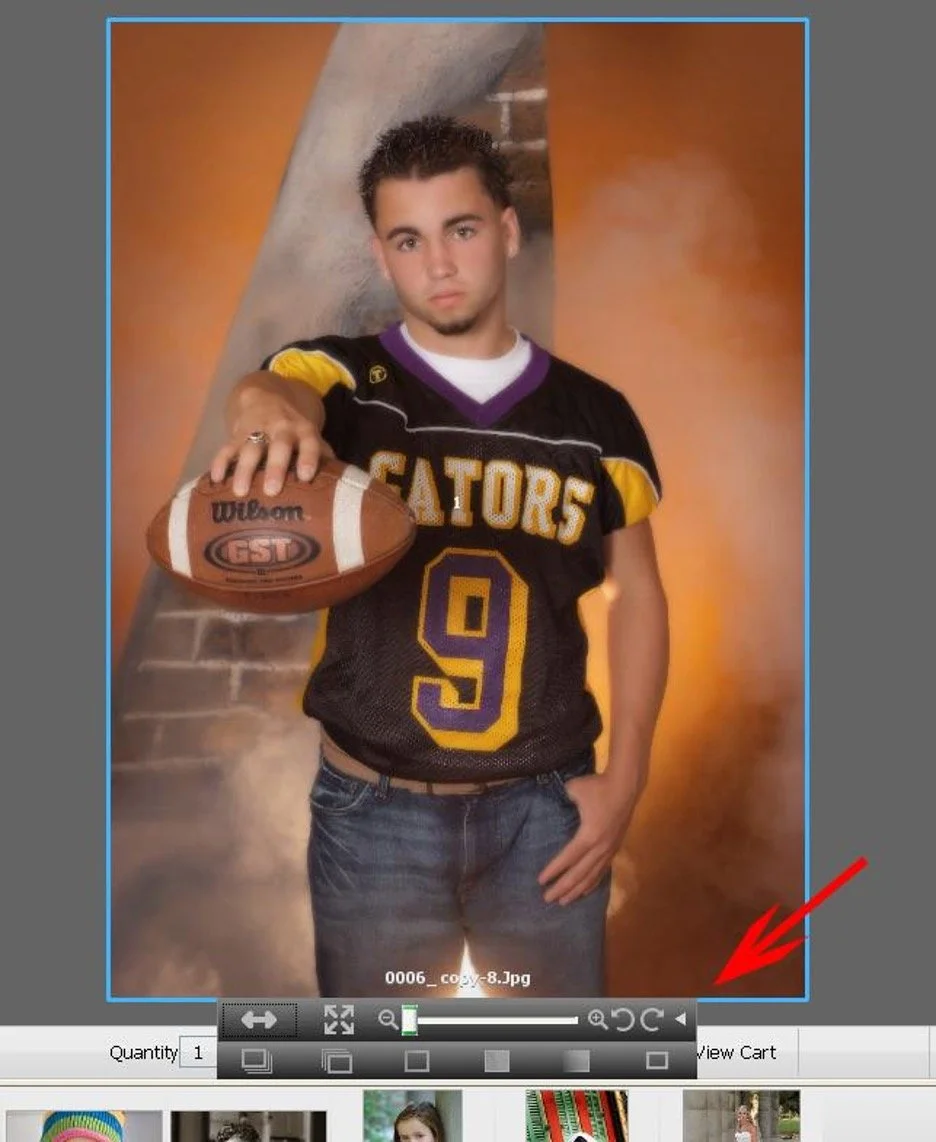
Additional options can be found by clicking the radio button to the right of the “add to cart” button.
Step 6: Place and Edit Your Image in the Product
Drag an image into the product area to preview how it will appear and crop.
Drag an image into the product area to preview how it will appear and crop.
Step 7: Review Additional Image Options
Click the radio button to the right of “Add to Cart” to access additional image-specific options.
Step 8: Add Items to Your Cart
Once your image and options are set:
Click “Add to Cart”
Repeat the process for additional products or images
Step 9: Review Your Order
Click “View Cart” to open the Order Review screen.
Here you’ll see:
Thumbnails of each item
Selected options
Quantities and pricing
You can:
Edit items using the Edit button
Remove items using Delete.

Step 10: Finalize Order Details
On the right side of the cart:
Enter a studio reference (optional)
Choose paper type
Apply promo codes (if applicable)
Add special instructions
Double-check everything before proceeding. You may also save the order for later.
Step 11: Complete and Send Your Order
After clicking “Complete and Send Order”, fill out your customer information carefully.
Important notes:
Enter a valid email address (confirmation is sent here)
If you don’t have a studio name, repeat your own name
Do NOT enter “N/A” — this will stop the order from sending
Next:
Choose your shipping method
Select how to send the order (Internet, save for later, or disc)
Choose your payment method
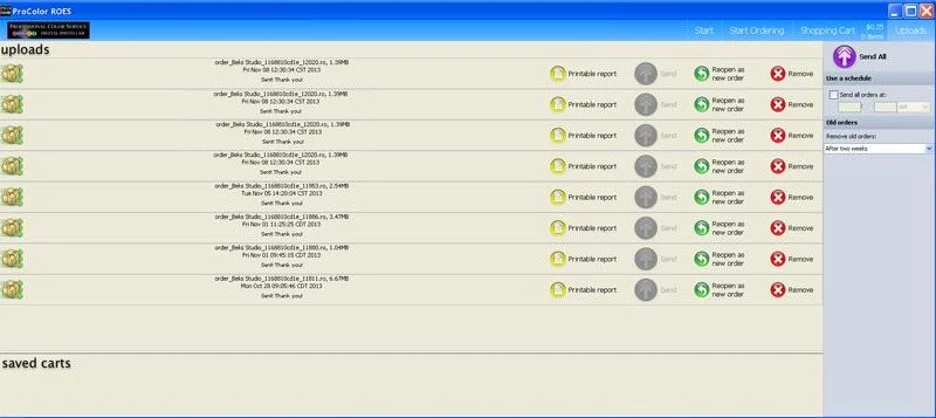
Step 12: Upload and Confirm
Once uploading begins:
Do not close ROES until the upload finishes
If ROES closes early:
Click Uploads in the top-right corner
Click Send next to the incomplete order
After the upload completes, you’ll receive an email confirmation once the order is processed.
ProColor ROES FAQs (Quick Answers)
-
ROES accepts .jpg and .tif files, 8-bit RGB.
-
Yes. ProColor ROES works on Windows and macOS.
-
Remove special characters from filenames and customer info
Avoid symbols like ~ ^ & * ( ) | < >
Ensure no firewall is blocking ROES
-
Confirm no firewall is blocking the program
Make sure the latest version of Java is installed
If issues persist, contact Customer Service
-
This is usually due to internet issues.
Try reconnecting or using a wired connection directly to your router. -
Orders sent outside business hours (Mon–Fri, 8–5) are confirmed when we reopen
Check your spam folder
Contact the lab for verification if needed
-
Select “Crop or Fit” and choose Fit to add white borders instead of cropping.